In the realm of modern dental restorations, all-ceramic crowns stand out as aesthetically superior options, providing a remarkable blend of visual appeal and functionality. This article serves as a comprehensive guide to all-ceramic crown tooth preparation, focusing on key aspects and techniques to ensure optimal results.
Overview of All-Ceramic Crowns
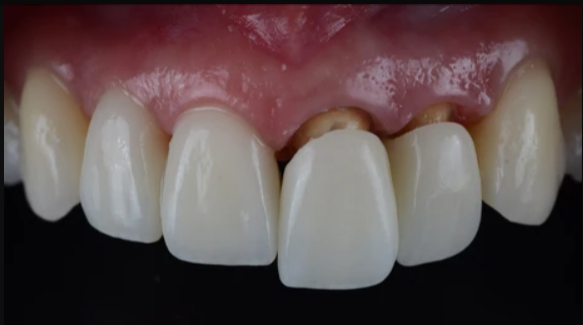
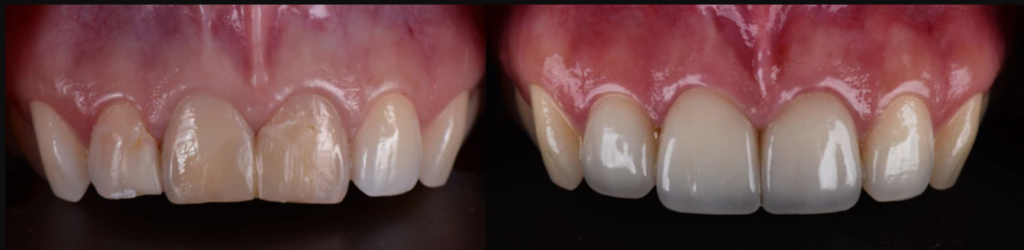
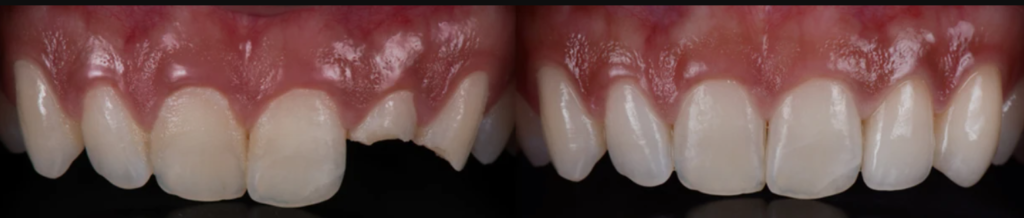
All-ceramic crowns, distinguished by their metal-free composition, offer unparalleled translucency that closely mimics natural teeth. Beyond aesthetic advantages, they boast biocompatibility and involve less tooth reduction compared to metal-ceramic counterparts.
Limitations and Considerations
Despite their numerous benefits, all-ceramic crowns come with specific limitations. Proper polishing techniques are crucial to minimize wear after adjustments, and they may not be suitable for discolored teeth. Additionally, carious teeth should be restored before all-ceramic crown placement to avoid aesthetic complications.
Tooth Preparation Guidelines
To ensure the success of all ceramic crowns, meticulous tooth preparation is paramount. Achieving a relatively even thickness circumferentially is directly tied to the burs used during preparation. The following guidelines offer insights into achieving optimal preparations for different materials.
Tips for Tooth Preparation
- Cavosurface Margins: Maintain 90° margins to prevent unfavorable stress distribution and reduce the risk of crown fracture.
- Anterior Preparations: Provide optimal support for porcelain along the incisal edge, involving a 2-plane reduction and ensuring sufficient coronal structure.
- Posterior Preparations: Implement 2-plane reductions on working cusps, distributing occlusal loads evenly and ensuring support by tooth structure.
- Material-Specific Guidelines: For IPS Empress® or e.max® crowns and anterior zirconia crowns, follow specific reduction ranges for facial and incisal areas to achieve aesthetically pleasing restorations.
Optimal Tooth Preparation Techniques
- Depth Grooves: Begin with depth grooves of approximately 1.0mm in diameter, connecting them to ensure proper occlusal reduction.
- Even Reductions: Repeat the depth groove process on all tooth surfaces to ensure even reductions.
- Eliminate Sharp Line Angles: Smooth shoulder margins with a 1-mm-wide circumferential shoulder or chamfer, eliminating sharp line angles.
- Avoid Undercuts and Transitions: Take care to avoid undercuts at the junction of the shoulder-axial wall. Use end-cutting fine diamond burs to achieve smooth shoulders.
- Lingual Surface Shaping: Use a football-shaped bur to reduce and shape lingual surfaces.
Post-Try-In Procedures
After try-in procedures, clinicians can enhance the appearance of restorations by considering the color of luting/bonding agents. Some systems, correlating with ceramic shades, are color-coded, allowing clinicians to experiment for optimal results.
References
- Glidewell Dental – All-Ceramic e.max Prep Guide
- Tooth Preparation Guidelines
This guide serves as a valuable resource for clinicians seeking excellence in all-ceramic crown tooth preparation.